实战指定DR和BDR
1.前期准备
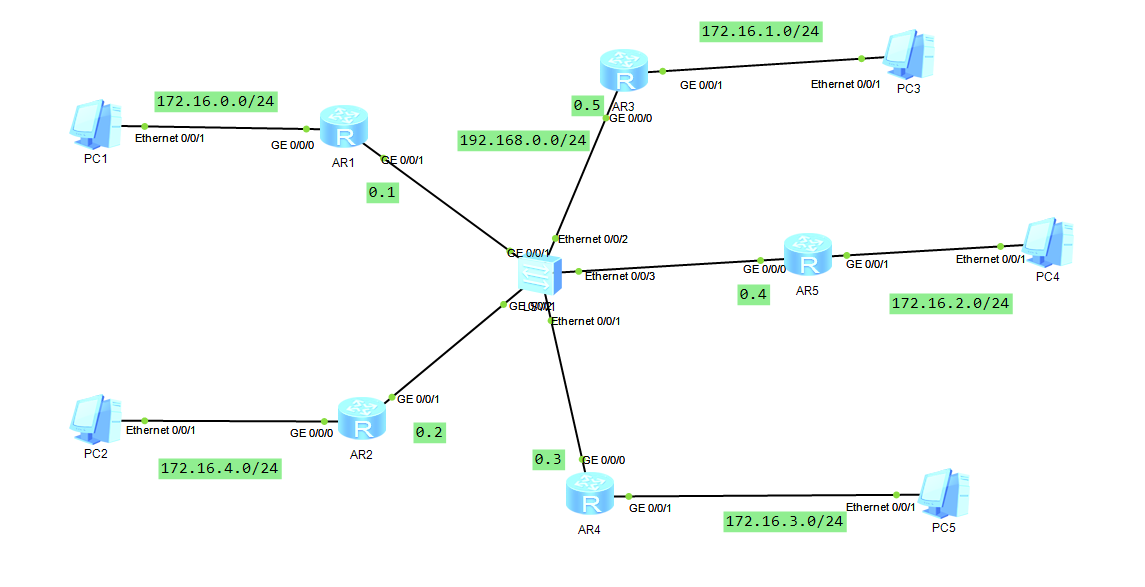
AR1
<Huawei>sys
[Huawei]user-interface console 0
[Huawei-ui-console0]authentication-mode aaa
[Huawei-ui-console0]aaa
[Huawei-aaa]local-user zhao password cipher 123456
[Huawei-aaa]local-user zhao privilege level 3
[Huawei-aaa]local-user wong password cipher 123456
[Huawei-aaa]local-user wong privilege level 3
[Huawei-aaa]local-user wong service-type ssh
[Huawei-aaa]quit
[Huawei]ssh user wong authentication-type password
[Huawei]stelnet server enable
[Huawei]user-interface vty 0 4
[Huawei-ui-vty0-4]authentication-mode aaa
[Huawei-ui-vty0-4]protocol inbound ssh
[Huawei-ui-vty0-4]return
<Huawei>save

<Huawei>sys
[Huawei]interface GigabitEthernet 0/0/0
[Huawei-GigabitEthernet0/0/0]ip address 172.16.0.1 24
[Huawei-GigabitEthernet0/0/0]quit
[Huawei]interface GigabitEthernet 0/0/1
[Huawei-GigabitEthernet0/0/1]ip address 192.168.0.1 24
[Huawei-GigabitEthernet0/0/1]return
<Huawei>save
AR2
AR3
AR5
AR4
2.配置OSPF
AR1
[Huawei]ospf 1 router-id 1.1.1.1
[Huawei-ospf-1]are
[Huawei-ospf-1]area 0
[Huawei-ospf-1-area-0.0.0.0]network 192.168.0.0 0.0.255.255
AR2
[Huawei]ospf 1 router-id 1.1.1.2
[Huawei-ospf-1]area 0
[Huawei-ospf-1-area-0.0.0.0]network 192.168.0.0 0.0.255.255
AR3
[Huawei]ospf 1 router-id 1.1.1.3
[Huawei-ospf-1]area 0
[Huawei-ospf-1-area-0.0.0.0]network 192.168.0.0 0.0.255.255
AR4
[Huawei]ospf 1 router-id 1.1.1.4
[Huawei-ospf-1]area 0
[Huawei-ospf-1-area-0.0.0.0]network 192.168.0.0 0.0.255.255
AR5
[Huawei]ospf 1 router-id 1.1.1.5
[Huawei-ospf-1]area 0
[Huawei-ospf-1-area-0.0.0.0]network 192.168.0.0 0.0.255.255
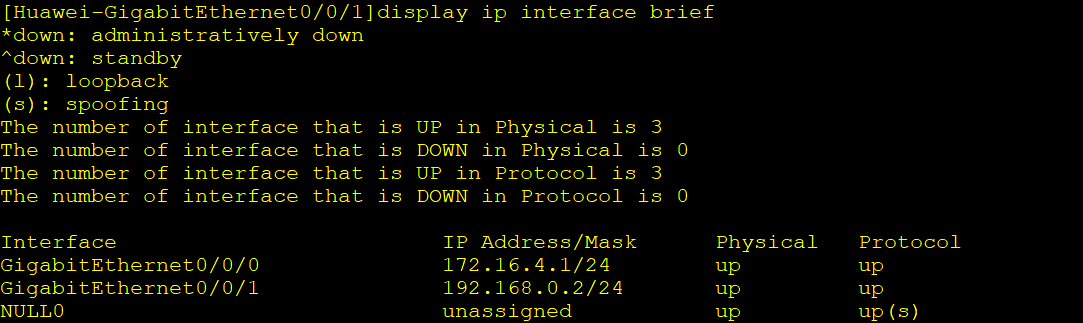
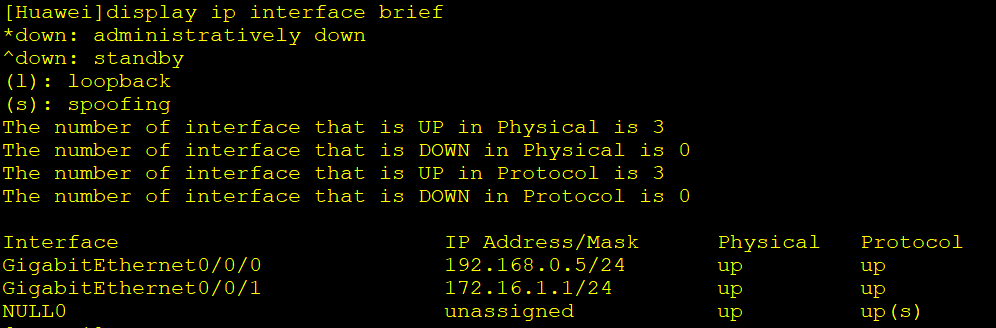
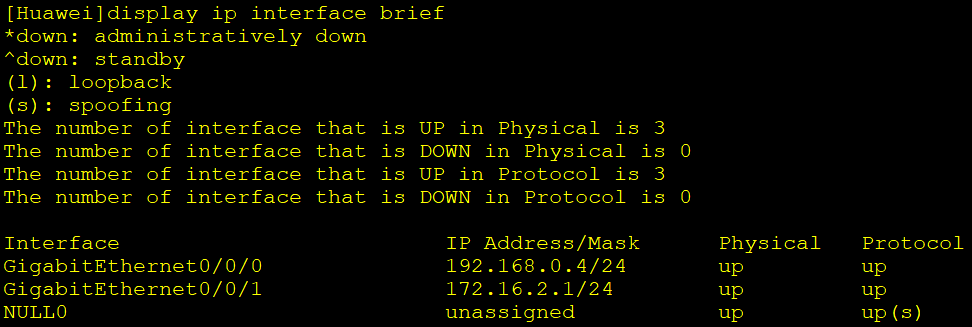
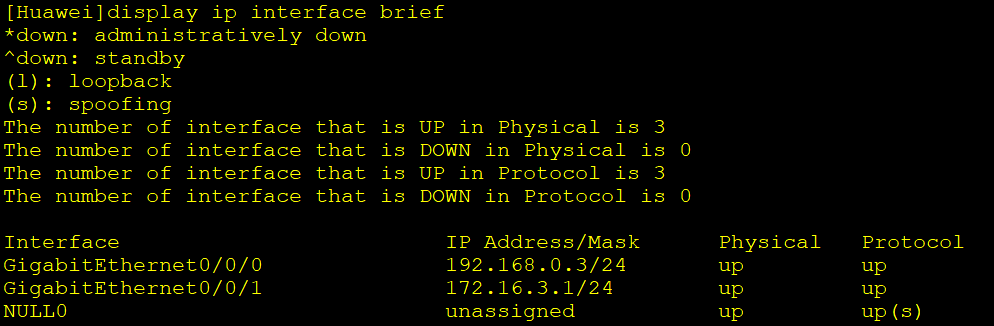
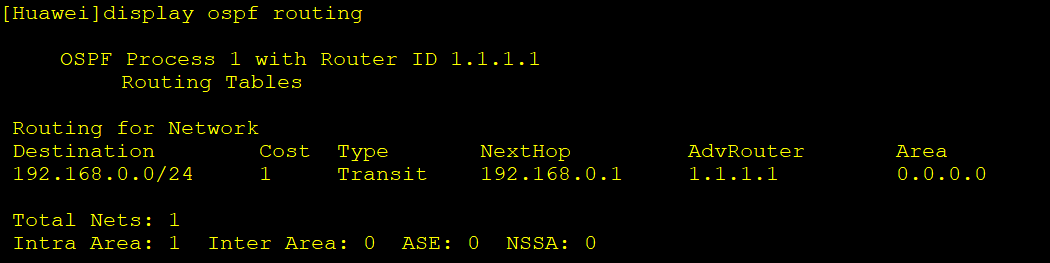
检查
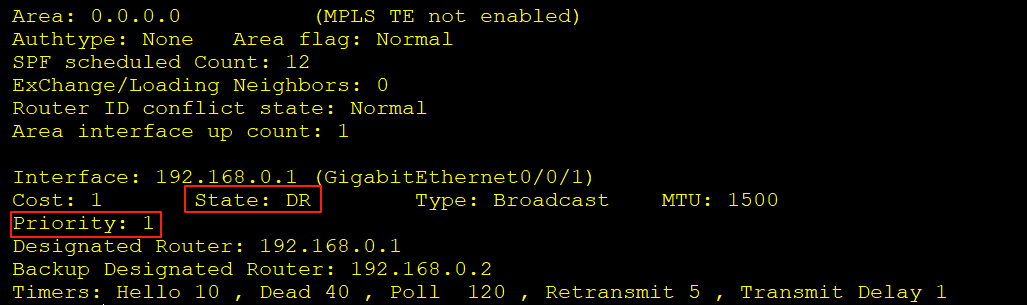

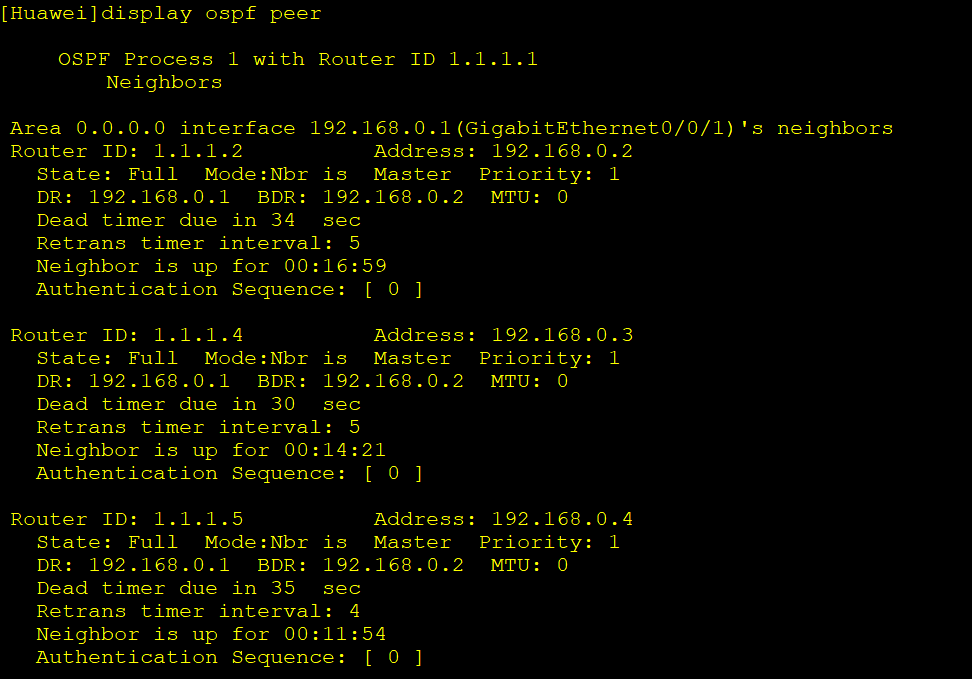
系统启动之初,DR和BDR具有一定的不确定性,所以会看到DR落在192.168.0.1,而正常的情况下应该时落在AR5,router-di 1.1.1.5(那个ID大指定那个)。
3.指定节点位DR和BDR
<Huawei>reset ospf 1 process

DR是192.168.0.2,BDR是192.168.0.4
AR1
[Huawei-GigabitEthernet0/0/1]ospf dr-priority 10
AR2
[Huawei-GigabitEthernet0/0/1]ospf dr-priority 5
AR3,AR4,AR5全部设置0
[Huawei-GigabitEthernet0/0/0]ospf dr-priority 0
AR1,AR2重启OSPF进程
<Huawei>reset ospf 1 process
