Contents
三、源码安装nginx并配置
1.下载nginx
nginx-1.18.0 程序下载地址:http://nginx.org/download/nginx-1.18.0.tar.gz
上传 nginx-1.18.0.tar.gz 到 linux 系统中

或
[root@mysite ~] # wget http://nginx.org/download/nginx-1.18.0.tar.gz
2.如果没有安装wget,请先安装
[root@mysite ~] # yum install wget -y
3.安装国内源(163)
[root@mysite ~] # wget -O /etc/yum.repos.d/163.repo http://mirrors.163.com/.help/CentOS7-Base-163.repo
4.安装 epel 扩展 yum 源
[root@mysite yum.repos.d]# rpm -ivh http://dl.fedoraproject.org/pub/epel/epel-release-latest-7.noarch.rpm
5.安装依赖
[root@mysite yum.repos.d]# yum -y install gcc gcc-c++ autoconf automake zlib zlib-devel openssl openssl-devel pcre*
6.下载PCRE库
[root@mysite yum.repos.d]# wget -O pcre-8.42.tar.bz2 https://ftp.pcre.org/pub/pcre/pcre-8.42.tar.bz2(wget可能已失效,用迅雷下载后用rz上传:yum -y install lrzsz)
[root@mysite ~]# tar -xjf ./pcre-8.42.tar.bz2 -C /usr/local/src/
7.上传nginx安装包,并进行源码安装
7.1. 隐藏Nginx标识和版本号
[root@mysite ~]# rz -E
[root@mysite ~]# tar zxf nginx-1.18.0.tar.gz -C /usr/local/src/
[root@mysite ~]# cd /usr/local/src/nginx-1.18.0/
本次共修改3个文件
1、修改 nginx 软件标识和版本号
[root@mysite nginx-1.18.0]# vim src/core/nginx.h
改:
13 #define NGINX_VERSION "1.18.0"
14 #define NGINX_VER "nginx/" NGINX_VERSION
为:
#define NGINX_VERSION "8.8.2" #此行修改的是你想要的版本号。
#define NGINX_VER "XWS/" NGINX_VERSION #此行修改的是你想修改的软件名称。
2、修改 HTTP 头信息中的 connection 字段,防止回显 nginx 标识**
[root@mysite nginx-1.18.0]# vim src/http/ngx_http_header_filter_module.c
改:49 static char ngx_http_server_string[] = "Server: nginx" CRLF;
为:49 static char ngx_http_server_string[] = "Server:XWS" CRLF;
3、修改 ngx_http_special_response.c 文件定义了 Nginx 报 404 错误时,不回显标识和版本号。
[root@mysite nginx-1.18.0]# vim src/http/ngx_http_special_response.c
改:
35 static u_char ngx_http_error_tail[] =
36 "<hr><center>nginx</center>" CRLF
37 "</body>" CRLF
38 "</html>" CRLF
为:
35 static u_char ngx_http_error_tail[] =
36 "<hr><center>XWS</center>" CRLF
37 "</body>" CRLF
38 "</html>" CRLF
7.2. 编译和安装 nginx
1、安装 nginx 时必须先安装相应的编译工具
[root@mysite nginx-1.18.0]# yum -y install gcc gcc-c++ autoconf automake zlib zlib-devel openssl openssl-devel pcre pcre-devel
2、创建一个 nginx 用户用于后期启动 nginx 进程使用,比你直接使用 root 用户启动 nginx 更安全
[root@mysite nginx-1.18.0]# useradd -s /sbin/nologin -M -u 2000 nginx
[root@mysite nginx-1.18.0]# id nginx
uid=2000(nginx) gid=2000(nginx) groups=2000(nginx)
3、编译和安装 nginx
./configure --prefix=/usr/local/nginx --user=nginx --group=nginx --with-http_ssl_module --with-http_realip_module --with-http_gzip_static_module --with-http_dav_module --with-http_stub_status_module --with-http_addition_module --with-http_sub_module --with-http_flv_module --with-http_mp4_module --with-pcre
[root@mysite nginx-1.18.0]# make -j 4 && make install
7.3.初次启动nginx服务
[root@mysite ~]# /usr/local/nginx/sbin/nginx
[root@mysite ~]# netstat -antup | grep 80                #有以下显示代表已成功启动
tcp        0      0 0.0.0.0:80              0.0.0.0:*               LISTEN      16860/nginx: master
7.4.把nginx加入到系统服务
[root@mysite ~]# vim /etc/profile.d/nginx.sh  #开机自动启动
export PATH=/usr/local/nginx/sbin:$PATH       #脚本里面添加
[root@mysite ~]# source /etc/profile.d/nginx.sh

[root@mysite ~]# echo $PATH
/usr/local/nginx/sbin:/usr/local/sbin:/usr/local/bin:/usr/sbin:/usr/bin:/root/bin
或使用软连接
[root@mysite ~]# ln -s /usr/local/nginx/sbin/nginx /usr/local/sbin/
测试服务是否生效
[root@mysite ~]# nginx -s stop
[root@mysite ~]# netstat -antup | grep 80
#没显示进程,证明已关闭
[root@mysite ~]# nginx
[root@mysite ~]# netstat -antup | grep 80
tcp        0      0 0.0.0.0:80              0.0.0.0:*               LISTEN      16895/nginx: master
#启动后,进程又再出现
7.5.使用chkconfig管理,并实现开机启动
[root@mysite ~]# vim /etc/init.d/nginx
#!/bin/bash
# chkconfig: - 99 2
# description: Nginx Service Control Script
PROG="/usr/local/nginx/sbin/nginx"
PIDF="/usr/local/nginx/logs/nginx.pid"
case "$1" in
    start)
    $PROG
    ;;

    stop)
    kill -3 $(cat $PIDF)
    ;;

    restart)
    $0 stop &> /dev/null
    if [ $? -ne 0 ] ; then continue ; fi
    $0 start
    ;;

    reload)
    kill -1 $(cat $PIDF)
    ;;
    *)

echo "Userage: $0 { start | stop | restart | reload }"
exit 1
esac
exit 0
使用chkconfig进行管理,配置服务开机自动启动
[root@mysite ~]# chmod +x /etc/init.d/nginx
[root@mysite ~]# chkconfig --add nginx
[root@mysite ~]# chkconfig nginx on
[root@mysite ~]# chkconfig
nginx              0:off    1:off    2:on    3:on    4:on    5:on    6:off
测试脚本情况
[root@mysite ~]# service nginx stop
[root@mysite ~]# netstat -antup | grep 80
[root@mysite ~]# service nginx start
[root@mysite ~]# netstat -antup | grep 80
tcp        0      0 0.0.0.0:80              0.0.0.0:*               LISTEN      16979/nginx: master
8.查看版本号修改情况
1.查看nginx版本号
[root@mysite nginx-1.18.0]# /usr/local/nginx/sbin/nginx -v
nginx version: xz/8.8.8
2.也可以隐藏版本号
[root@mysite nginx-1.18.0]# vim /usr/local/nginx/conf/nginx.conf
21 default_type application/octet-stream;         #在这行下面,插入以下内容
server_tokens off;
[root@mysite nginx-1.18.0]# /usr/local/nginx/sbin/nginx -s reload
#使用另外一台服务进行爬
[root@LNMP ~]# curl -I 192.168.50.222
HTTP/1.1 200 OK
Server: XWS      #没有了版本号了
Date: Mon, 10 Apr 2023 23:38:42 GMT
Content-Type: text/html
Content-Length: 612
Last-Modified: Mon, 10 Apr 2023 23:17:37 GMT
Connection: keep-alive
ETag: "64349911-264"
Accept-Ranges: bytes
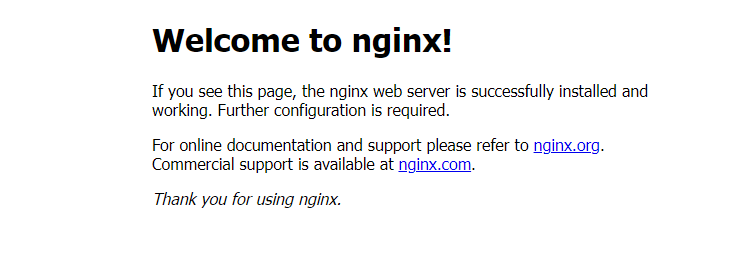
9.测试nginx是否能访问
输入服务器IP,显示下图图片,证明可以访问
10.修改配置文件,使得nginx支持php
备份:
[root@mysite ~]# cp /usr/local/nginx/conf/nginx.conf{,.bak}
修改:
[root@mysite ~]# vim /usr/local/nginx/conf/nginx.conf
修改用户为 nginx:
改:2 #user nobody;
为:3 user nginx;
启用 PHP 支持
第 66 行始 修改为:(删掉“#”)
66 location ~ \.php$ {
67 root html;
68 fastcgi_pass 127.0.0.1:9000;
69 fastcgi_index index.php;
70 fastcgi_param SCRIPT_FILENAME /usr/local/nginx/html$fastcgi_script_name;
71 include fastcgi_params;
72 }